I prepare a simple demo app for team to knowledge sharing to achieve a related goal into worklight.
then I think about why not share on blog by following a great dialog stated "Human knowledge belongs to the world" in movie (I don't remember which one :).
In this blog entry I am not going in much about introduction of Worklight and some of its component but expecting a reader to do few reading using a Google or IBM info center. So
IBM Worklight provide multiple adapters to interact with different media and work as mediator between mobile application and enterprise system. please follow the link to read Overview of IBM Worklight Adapters. This entry is cover the SQL Adapter.
Below image is illustrate high-level process involve.

now next step is to create Worklight Adapter.
Step 2:

after hit the finish button this will create the adapter with name Product under adapters folder include 2 files Product.xml and Product-impl.js.
Now open the Product.xml file and do define the Datasource like this.
if you see your Product-impl.js file you find all you procedures in Step 2 image are automatically generate structure for developer to just change the column name and redefined the query as per need like below. for short explanation I am include two procedure code snippet here one is getProducts fetch all the project and another one is to insert.
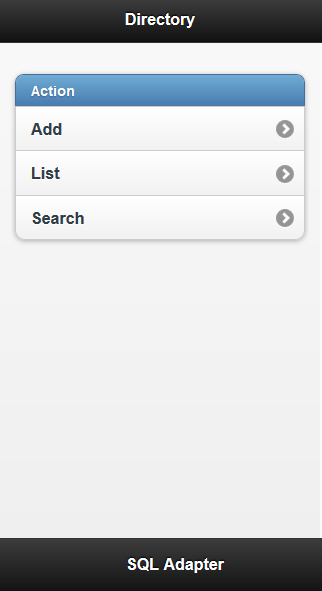
now to call this procedure in client side adding a example of Add product.
Worklight Console : Screen 1
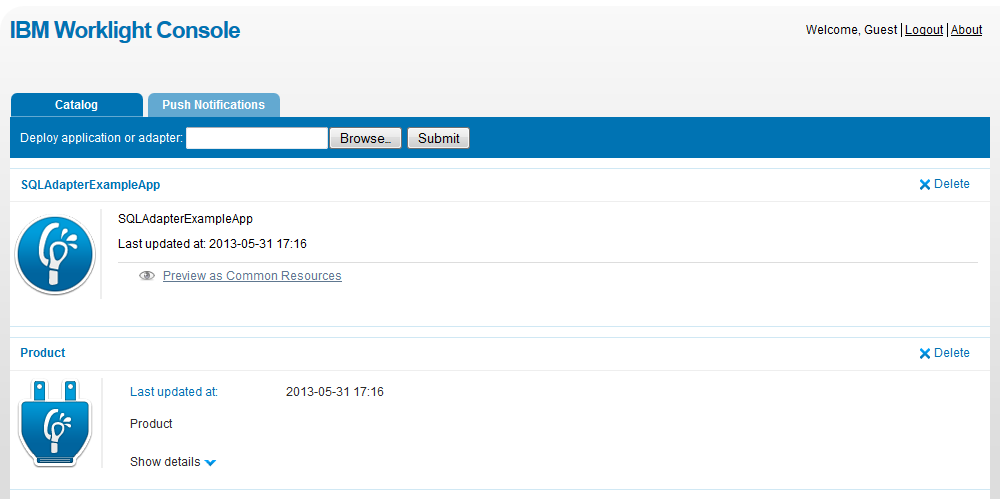
 Worklight Console : Application Screen
Please click here to download the source code.
then I think about why not share on blog by following a great dialog stated "Human knowledge belongs to the world" in movie (I don't remember which one :).
In this blog entry I am not going in much about introduction of Worklight and some of its component but expecting a reader to do few reading using a Google or IBM info center. So
IBM Worklight provide multiple adapters to interact with different media and work as mediator between mobile application and enterprise system. please follow the link to read Overview of IBM Worklight Adapters. This entry is cover the SQL Adapter.
What is SQL Adapter?
The name itself is expressing, it provides access to enterprise databases to execute the parametrized SQL queries and stored procedures that retrieve or update data in the database.Below image is illustrate high-level process involve.

Its Time for Action
Before start assuming you have already setup Worklight environment and now follow the steps is to create a SQL Adapter in Worklight.I have running my MySQL database on my local system. Please follow the step 1 to use this script add table into your schema.
Step 1:
CREATE TABLE `product` (
  `productID` int(11) NOT NULL AUTO_INCREMENT,
  `productName` varchar(255) DEFAULT NULL,
  `Qty` int(10) DEFAULT '0',
  `Model` varchar(255) DEFAULT NULL,
  `price` int(10) DEFAULT '0',
  PRIMARY KEY (`productID`)
) ENGINE=InnoDB AUTO_INCREMENT=6 DEFAULT CHARSET=utf8
now next step is to create Worklight Adapter.
Step 2:

after hit the finish button this will create the adapter with name Product under adapters folder include 2 files Product.xml and Product-impl.js.
- Product.xml (to define Data Source for DB and declare procedures you target to invoke)
- Product-impl.js ( to defined queries to invoke against every procedure you defined in Product.xml)
Now open the Product.xml file and do define the Datasource like this.
<connectivity>
<connectionpolicy xsi:type="sql:SQLConnectionPolicy">
   <datasourcedefinition>
     <driverclass>com.mysql.jdbc.Driver</driverclass>
     <url>jdbc:mysql://localhost:3306/demo</url>
     <user>root</user>
     <password>root</password>
   </datasourcedefinition>
</connectionpolicy>
  <loadconstraints maxconcurrentconnectionspernode="5">
</loadconstraints>
</connectivity>
if you see your Product-impl.js file you find all you procedures in Step 2 image are automatically generate structure for developer to just change the column name and redefined the query as per need like below. for short explanation I am include two procedure code snippet here one is getProducts fetch all the project and another one is to insert.
/* Select Statement */
var selectProductStatement = WL.Server.createSQLStatement("select "+
"productID, productName, Qty, Model, price from product "+
"ORDER BY productName");

function getProducts() {
 return WL.Server.invokeSQLStatement({
  preparedStatement : selectProductStatement,
  parameters : []
 });
}
/* Insert Statement */
var insertProductStatment = WL.Server
  .createSQLStatement("insert into product "+
" (productName, Qty, Model, price) values (?, ?, ?, ?)");

function addProduct(productName, qty, model, price) {
 return WL.Server.invokeSQLStatement({
  preparedStatement : insertProductStatment,
  parameters : [ productName, qty, model, price ]
 });
}
now to call this procedure in client side adding a example of Add product.
function addProductRec() {
   var validate = true;
   var query = {};
   if ($("#prod_name").val() != "") {
        query.productName = $("#prod_name").val();
   } else {
        validate = false;
   }

   if ($("#prod_model").val() != "") {
        query.Model = $("#prod_model").val();
   } else {
        validate = false;
   }

   if ($("#prod_qty").val() != "") {
        query.Qty = $("#prod_qty").val();
   } else {
        validate = false;
   }

   if ($("#prod_price").val() != "") {
        query.price = $("#prod_price").val();
   } else {
        validate = false;
   }

   if (validate) {
       var queryData = JSON.parse(JSON.stringify(query));

       WL.Client.invokeProcedure({
                adapter : "Product",
  procedure : "addProduct",
  parameters : [ queryData.productName, queryData.Qty,
                      queryData.Model, queryData.price ]
  }, {
                  onSuccess : function(result) {
                  $.mobile.changePage("#list", {
          transition : "slide",
   reverse : false,
   changeHash : false
           });
                 getProductsRec();
  },
    onFailure : failureCallback
  });
 } else {
            alert("All fields required");
 }
}
Worklight Console : Screen 1
 |  |
Please click here to download the source code.